Home | Galleries | Techniques | Contact
Camera Techniques | Exposure Techniques | Darkroom Techniques
THE VIEW CAMERA
THE VIEW CAMERA
 ADVANTAGES AND DISADVANTAGES OF THE VIEW CAMERA
Making the change from a hand held 35mm or medium format camera to a view camera is a pretty big step. It can be almost like starting all over again. A view camera doesn't do anything automatically. Lenses must be set manually. Each sheet of film is individually loaded into the camera.
There are no built in meters, so you have to learn to use a hand-held exposure meter. Obviously, a tripod is necessary. The image is upside down and backwards which can be a little confusing at first. A view camera takes longer to set up and use than a 35mm or digital camera.
There are many things the view camera can do that you can't accomplish with a 35mm camera. The view camera records details more finely with its larger negative than you could on 35mm film. For example, a 35mm negative yields an acceptable 8x10" print, any further enlargement and the print becomes grainy and fuzzy looking. A 4x5" negative yields a crisp 30x40" print. An 8x10" negative could be enlarged to wall size while still remaining sharp and detailed.
6x7cm and 6x9cm roll film backs can be used on a 4x5" view camera to carry much more film and still take advantage of the view camera movements. These medium format negatives will enlarge well up to 20x24".
The view camera allows you a great deal more control of the photograph, by taking advantage of the cameras different movements. Some of the more commonly used movements are rise and fall, and tilts and swings. The movements affect shapes and spatial relationships within the image.
Objects in a part of the image can be accentuated, such as the foreground rock of Matilija Creek. Line convergence can be eliminated by keeping the film plane parallel to a building while tilting the lens. View Camera Movements gives greater detail on how manipulation affects the focus plane.
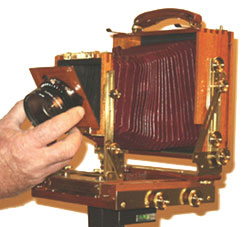
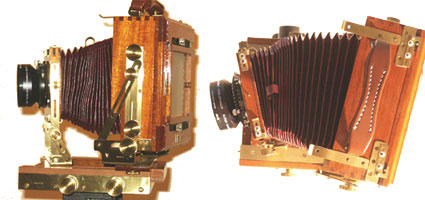
The basic design of the view camera has changed very little over the last 100 years. The camera, to put it simply, is a light tight box with a lens mounted on one side that projects an image onto a piece of light sensitive material on the opposite side of the box. The rail or bed is the foundation for the rest of the camera and all of its movements.
The front standard is the frame that holds the lens board, the frame can be moved along the rail or bed. This is used for focusing. The lens focuses the rays of light reflected from a scene back onto a ground glass at the rear of the camera.
The lens is mounted into a lens board that fits into the front standard. Lens boards are interchangeable so you can use different lenses of varying focal lengths. You can buy adapters to adapt one manufacturers lens board to another manufacturers cameras.
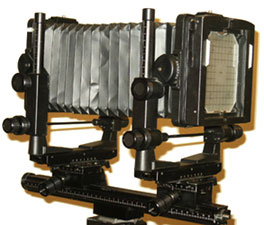
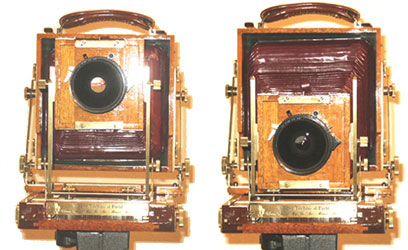
The rear standard on a monorail camera is almost identical to the front standard. The back standard carries the ground glass and is used for focusing. The ground glass is a frosted piece of glass that captures the image projected back from the lens. The image appears upside down and backwards because there is no reflex mirror as in a 35mm to correct the image.

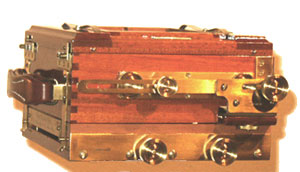
Film holders are inserted into the rear standard after focusing and composition. This photo shows a film holder only partially inserted. Once the film holder is completely seated the dark slide is removed to take the photograph.
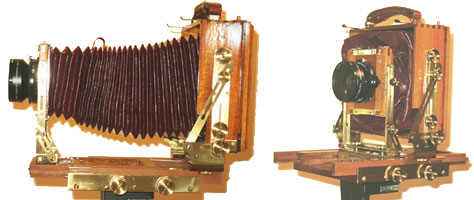
Between the two standards there is a bellows, this is basically just a light tight tube that connects the two. It is flexible so that the front and rear standards can be moved closer together or further apart for focusing. The bellows flexibility also allows you to move the front and rear standards up, down or sideways independently. Bag bellows allow movements with lenses of very short focal length.
View camera design has undergone some major refinements over the years. Many of the high tech studio cameras have sophisticated focusing devices to determine the tilt, swing and the f-stop settings necessary for different situations. You can get electronic shutters and there are exposure meters that slip into the camera back. There are several companies that make completely computer controlled cameras. Interchangeable backs can change the film format to a wide panorama.
Before using movements to enhance an image, the camera should be leveled and the camera adjustments zeroed. Next, select a lens and rough focus the camera. Focus by moving the film plane or the rear standard so as not to change the image. Moving the lens stage, the front standard, to focus will change the size or appearance of the image. Once the subject is in focus, you can start making determinations on what other movements you want to use.
 The most basic movements are rise and fall. They move the position of the image relative to the film without having to tilt the whole camera up and down. To get more sky in a photograph, you raise the front standard. For more foreground you lower the front.
Since the film and the lens plane remain parallel, regardless of how much rise and fall you use, no change in the shape of the image will occur. Only the image�s position on the ground glass has been altered. An example of this would be photographing a tall building. If you keep your rear standard parallel with the face of the building and are able to raise the front lens stage to a sufficient height to get the top of the building in, the lines on the building will be parallel on the film.
 With cameras that have limited rise and fall, you can use rising and falling bed movements to compensate. If the lens board can't be moved down vertically from the central position you can make an equivalent adjustment by tilting the camera bed down, and then restoring the front and rear standards to a vertical position.
The lateral shift of the front and rear standard has a similar effect as the front rise and fall does, except you are moving from side to side instead of up and down. This can be useful when it is necessary to position the camera off to one side of your subject due to an obstruction or reflection.
Moving the back of the camera up, down or sideways will move the image across the ground glass so it does not change your perspective, it affects only how much of the image is seen on the ground glass. It doesn't have any effect on the image shape or the point of view. Moving the lens, on the other hand, does alter the camera's view point. The relationships between near and far change when you move the lens.

Swings and tilts are rotations of the lens stage or the film stage on the vertical and horizontal axis. Or in the case of many field cameras, base tilts instead of through the lens axis tilts. Swings and tilts do not have the same effects for the front and rear standards. Pivotal movement of the lens plane affects only the image sharpness. A subject can be brought into sharp focus by tilting the lens permitting the use of a larger aperture and shortening the exposure.
 Swings and tilts on the film stage on the other hand, will not only change image sharpness but will also change the shape of objects in the image. The most common reason for using swinging and tilting motions of the film stage is to purposely affect the shape of an object. Shape changes occur when the plane of the film and the subject are not parallel. This is most obvious when the subject has well defined parallel lines.
Rear standard swings and tilts are commonly used to control the convergence of vertical and horizontal lines. You can also use these movements to emphasize a foreground object by tilting the film stage back towards you. Subjects that are further away from the film plane will appear larger. Subjects that are closer to the film plane will appear smaller. A good example of this is the emphasis added to the foreground rock in Matilija Creek.
 MONORAIL vs. FOLDING FIELD CAMERAS
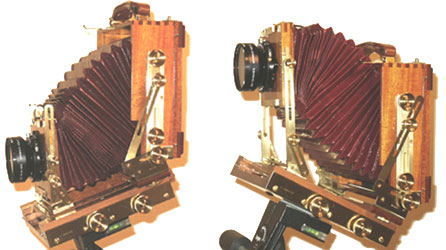
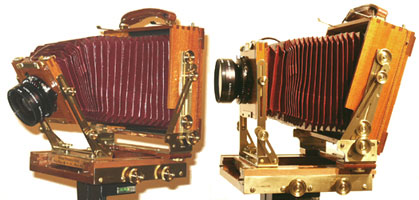
There are two basic types of view cameras, monorail cameras and field cameras. Monorail cameras are primarily used in studios. Their bulk makes them more difficult to transport, but they do offer quite a bit more movement as opposed to a field camera. Field cameras are lighter in weight and fold up into a fairly small package that is quite portable.
There are several manufacturers who transcend the boundaries between monorail and field cameras. Linhof makes the Technikardan which is a monorail view camera that folds up compact enough that it can be easily transported to the field. It is small light, and has quite a bit of movement.
Books and Magazines
Workshops
Equipment
Miscellaneous